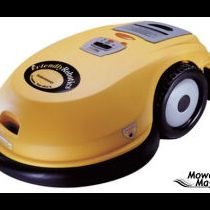
Showing posts with label robotic lawn mower. Show all posts

Friday, 22 September 2017

YardForce Lawn Mower: New Robotic Lawn Mower to Rival Flymo 1200R

The Yard Force SA series robotic lawn mowers are German built, four wheeled, swing bladed lawnmowers with a price bracket that matches the cheaper end of the market such as the Flymo 1200R.

The basic features are similar:

  • Perimeter wire;
  • Weatherproof charging station;
  • 3M style connectors;
  • Swing blades, etc...

However, there are also some aspects that are an improvement on the venerable Flymo / Gardena / Husqvarna automowers.

Yard Force SA600 Specifications

For a start, the wheels are solid, and there are four of them. This means no rubber bits to wear out, and cause the wheels to come apart, as happened with the Flymo, before we replaced them.

The mower happily deals with up to 40% (27 degrees) of slope, too, even in the wet. However, mowing in the rain is not recommended.

It has a large touch-screen to adjust various parameters, and a handy set of icons for illustrating the exact level of battery charge.

It's a real bonus to be able to see all the relevant information on the screen at once, too, unlike the line-by-line approach of other mowers. It's not quite as good as the Miimo's screen, but that comes at a price.

Naturally, in line with all the others, it has the usual PIN protection as well.

Yard Force Lawn Mower Manual Review

According to the Yard Force SA Series Manual, installation is pretty much the same as all other boundary-wire based mowers.

As seems to be the trend, there's no return wire, which increases reliability, but means that the manufacturers have to come up with increasingly clever ways to get their bots back to the charging station!

Programming looks easy, and is well-explained. There doesn't seem to be a function to change the way that the mower cuts (i.e. no 'lines' or 'spiral' setting), but the grid approach to programming the timer looks to be effective.

Various options, such as the rain sensor, can be turned on and off, and there's both a handy 'Stop' and 'Home' button.

Finally, the blades seem to be the standard type used by most spinning, rotating blade mowers, so the replacement blade cost ought to be in line with other manufacturers.

Yard Force Lawn Mower Price

The Yard Force SA600 is listed at around £600 at the time of writing, which makes it competitive when compared with the Honda Miimo and Abrogio mowers.

It's still slightly more expensive than the Flymo 1200R, but arguably the solid wheels, and higher level of customisation make for better value for money.

Monday, 18 September 2017

Honda Miimo 500 Robotic Lawn Mower: Price, Manual, Review

The Honda Miimo 500 is one of the more expensive robotic lawn mowers on sale. Although it has a lot of key features (such as silent running and different cutting modes), it also lacks some, like Bluetooth or WiFi control, that cheaper models are starting to offer.

On the other hand, Honda has a long association with robotics and electric vehicles, making it a natural first choice for those looking for reliability and innovation.

The HRM 500 is the middle model in the Miimo range, and has a bigger battery, allowing it to mow a larger area than the 300 series, but lacks some of the features (such as smartphone control) enjoyed by the model above it.

Honda Miimo 500 Robotic Lawnmower Features

The HRM 500 has some interesting features that mark it a cut above (pun intended) mowers like the Flymo 1200R:

  • Ability to cut in stripes;
  • Up to 5 programmable 'start points';
  • Special 'edge cutting' mode.

It's also nearly silent, and has blades that bend rather than snap when they hit a solid object like a rock.

Honda Miimo 500 Reviews

Here's a run-down of opinions across the various review sites:

  • UK's Alphr has a comprehensive review which confirms the silent operation, and notes that, if you employ a gardener, they would have to cut the lawn over 60 times before paying back the purchase price (source: Alphr.com.)
  • C|Net called it "an adorable Roomba for your lawn" (source: C|Net.com), citing innovative features such as timers and variety of cutting modes.
  • The UK's Which? magazine praised its good looks, but lamented a 'luxury' price tag (see Which? online).
  • The German site Testberichte gave it a score of 1.9 'Good' (source: Testberichte.de) with lower scores going to the operating instructions (poor) and time between charges (average).
  • The Netherlands-based Rientes Tuinmachines was also impressed, noting the mulching capability and giving precise instructions on laying the perimeter wire (see their web site.)

It's worth noting that there aren't any Amazon.co.uk reviews at the time of writing.

Honda Miimo 500 Manual

The manual can be downloaded from Honda's site.

A quick glance through it doesn't confirm Testberichte's assertion that it is a difficult read. In fact, I found it both clear and comprehensive.

Alphr also noted that it requires a Honda technician to install: however, the installation is very well covered in the manual. I'd recommend doing it yourself, if only so that you know how to fix it if something goes wrong!

The manual also confirms some of the more advanced features, such as:

  • Setting mowing start points (Page 19)
  • Setting the Work Calendar (Page 22)
  • Setting the work timer by start point and season (Pages 27-29)
  • Programming 'Quiet Times' (Page 30)
  • Settings for narrow passages, and other configurations (Pages 32-37)

All in all, from the opinions, manual, and various videos, it's clear that the mower has a lot to recommend it. The level of customisation is beyond anything that I've seen in other robotic mowers, but it's unlikely that anyone with a regular shaped garden will ever need most of them!

Honda Miimo 500 Price

The HRM 500 is quite expensive. Amazon lists it at around £2,200 and Alphr at £1,900; which puts it at around 3-4 times more expensive than the Flymo 1200R.

However, the Flymo is noisier, has fewer mowing patterns, and can only start from a random point (or the end of the return wire). It also doesn't have the customisation that the Honda has, which makes it easy to install, but useless for complex lawn designs.

Oh, and the Honda is better looking.

Of course.


Thursday, 14 September 2017

AL-KO Robolinho 3000 Review: Comparative Review of the AL-KO Robolinho 3000 Robotic Lawn Mower

AL-KO has a proud tradition in the production of lawnmowers. They first started building them in 1966, and in 1975 were honoured with a Franz Beckenbauer (then a famous professional footballer) testimonial for their Golden Line mowers.

Now, with the AL-KO Robolinho, they've taken their reputation for safety and quality, and applied it to the world of automatic robotic lawn mowers, production of which actually goes back to 2012.

This comparative review* looks at the AL-KO Robolinho 3000;one of the most popular models, if not the cheapest, at around £2,000 as we went to press.

So, what do you get for your money?

Blades


The first difference between many of the mowers on the market an the AL-KO line is the blade configuration.

The Robolinho has double-decker blades, apparently offering improved mulching and less grass build up. Regular readers will remember what happened to the Flymo 1200R when grass built up inside our mower. Long story short: the rubber dampers broke, presumably as a result of the acid in the grass.

Anything that helps reduce grass build-up and mulch better at the same time is to be welcomed. The innovative twin blades are non-standard, though, which potentially makes them more expensive to replace.

Boundary Wire & Charging Station


The Robolinho uses a standard boundary wire, but no return wire. So, unlike other mowers (actually, mainly those based on the Husqvarna Automower chassis, like the Gardena R40LI, or Flymo 1200), the mower has no easy way to get 'home'. It even has a 'home' button, which is an innovative feature, but without a return wire, I suspect it will spend a while bumping around until it finds, and presumably follows, the boundary wire.

With a 1200 square meter mowing area, that could be a long journey!

The home itself has to be placed on the boundary wire, akin to mowers from, for example, Bosch, and has a single transformer providing power. It's an open charging station, according to the installation manual.

Looking at images of the charging unit, it seems that connection is provided by two pads, that match up to two pads on the base station. This could be an improvement over the 'slot in' connectors that other makes have to contend with, which can get dirty, but one has to question what happens if the pads become slightly burnished or if they are exposed to corrosion.

Features


The control panel looks about the same size as the Flymo 1200R, but seems to contain space for a bit more explanatory data judging by the screen shots in the manual. There are also some fairly self-explanatory buttons around the edge of the screen, which make programming easier.

One of the additional features is the rain sensor, built into the mower, but the manufacturer also notes that the mower is quite capable of cutting the lawn in the rain.

Conclusion


Most of the features are comparable to other brands, but there are a few areas that, for the price, you'd expect a bit more for your money:
  • Small screen;
  • No GPS;
  • Open base station.

The upside is the large mowing area. However, since the Flymo 1200R is now around £500, you can get three of them, and still be £500 better off for the 1200 square meters, or just risk buying two, and be £1000 better off...

In addition, the mower comes with rubber coated wheels, which I always find a bit of-putting. Read "...and then the wheels came off" to find out why I swapped from rubber to solid wheels on the Gardena R40Li.

To sum up: the specification is okay for the price, and AL-KO has a solid reputation for quality, but there are mowers that represent better value for money, with more modern features like GPS and smartphone control.

(* DISCLAIMER: review performed by comparison to the Flymo 1200R / Garndena R40Li range on the basis of features only, and is not an ownership-based review.)

Sunday, 23 October 2016

Gardena Robotic Lawn Mower Review

We have owned the Gardena R40Li robotic lawn mower since I started this blog, back in 2013. In fact, one of the reasons I started the blog was to share my experiences and decision process, and as such now feels like the time is right to write a full Gardena robotic lawn mower review, having lived with the beast for three seasons.

For those who don't have time to read the full review, here are the bullet points. First, the good:
  • The grass has never looked better;
  • I got time back to do railway modelling instead;
  • The whole experience has been almost pain-free.
Now, the not-so-good:
  • Yes, it was expensive;
  • Yes, parts fail (if you don't take care of it);
  • Yes, moving the perimeter wire can be a pain.
The conclusion -- I would buy it again, but I'd take better care of it (i.e. clean it properly) and set it up a bit differently, probably getting in an expert to do that with me. After all, they did offer a free consultation!

Gardena Robotic Lawn Mower Installation

Installing the mower looked so easy on the DVD that came with it that I decided to go it alone, despite the kind offer to have someone come and help me install the perimeter wire (for free). One Sunday afternoon, instead of actually mowing with the old petrol-fired behemoth that it was to replace, I got stuck into the installation process.

The R40Li comes with it's own charging station, which sits on a perimeter wire, which stops the robot going off and mowing the tulips and neighbours drive when it should be doing the lawn. There's also a kind of follow-me cable that hooks up the mid-point of the perimeter wire to the charging station.

The idea is that, if the robot runs out of juice, it can find the wire, and subsequently find its way home. This is a system that works very well, but also has a dual use, as the wire can also be followed to a hard-to-reach part of the garden in case the mower is in danger of missing it due to a narrow entrance.

This is, in fact, something I regret not having done. 

Instead, my return loop is just a straight line. Having connected everything up and left it there for three years, I'm wary of upsetting the apple cart by relocating it, and probably the professional installer would have spotted my error straight away!

Other than that, once everything was in place, pinned down with the black plastic pegs and connected with waterproof 3M connectors (all supplied in the box), and plugged into my outside plug socket -- note, this is indispensible -- the mower charged up and was put to work.

It does take an afternoon of hammering little pegs in, testing electric circuits, and crossing fingers on occasion, but you can do it on your own. Just try to think it through a little bit more than I did!

Operation of the Gardena Robotic Lawn Mower

The mower runs on a daily programme, which can be varied through the slightly confusing on-board menu system. Be prepared to keep the instructions to hand for the first few weeks, as you'll be fine-tuning things like the time of day the mower should operate, and the number of times it follows the cable to the end before starting a run rather than just setting off in a random direction from the base.

And, the mower is governed by randomness.

It sets off when its charged, but pretty randomly, in a random direction, and changes that direction by a random amount whenever it hits an obstacle, or reaches the boundary perimeter wire.

Repairing the perimeter wire is also part of the ongoing operation and maintenance of these kinds of robotic mower, and it is a bit of hassle. Here's a tip: make sure you keep a long piece of single-core wire handy for troubleshooting, and don't bury the wire intentionally; just let the grass grow over it, or cover it with thin paving stones that are absolutely level with respect to the lawn.

The reason for this is that fault finding requires connecting one end of the cable to the base unit, and then hooking the other end to various points on the perimeter until you get a green light.

After the first few times, it gets a lot easier; but for that first time -- make sure you have wire handy, as well as a knife to scrape a little plastic off the perimeter wire, a crocodile clip to connect the wire to the perimeter cable, and some electrical tape to fix it up after...

Parts that Failed on the Lawn Mower

The first item in this category -- blades -- isn't really failure. You need to change the blades every so often.

Tell tail signs that the blades need replacing are:

  • Wobbling mower caused by uneven weight distribution (one might be broken);
  • Unusual noise;
  • Grass tips going brown (unevenly cut; more torn than cleanly cropped).
Luckily, removing them is child's play; but don't let a child near them because they're sharp! They just unscrew from the underside, and the packs of replacement blades come with new screws and full instructions.

Then, the wheels came off. Actually, that's not true. What happened was the rubber came off, and the wheels stopped gripping (this was after 3 seasons use, with no over-wintering). The replacements have a solid, moulded tread, so they'll last for the rest of the product's lifetime.

Also this year, the dampers broke. The rubber perished, and they stopped preventing the outer bumper from bashing against the collision detection system, as discussed here.

Other than these few points, which encourage me to take much better care of the mower (i.e. cleaning it and overwintering it properly), the last three seasons have been trouble-free.

Summary - Should You Buy a Gardena R40Li Robotic Lawn Mower?

Here's the thing -- I can't answer that, because I have no idea whether your lawn qualifies. However, if you hate following your mechanical mower around a pretty standard lawn, then I'd certainly consider it.

Tuesday, 19 July 2016

Is This Just The Most Expensive Anti-Mole & Auto-Mulching Device Ever?

It's been a while (3 years) since I received the best time-saving gift ever, in my opinion.

Had I listened to the naysayers, my friends and colleagues included, I would have been gearing myself up for a life spent hunting for perimeter wire breaks, changing spinning blades, unclogging the mechanism, replacing batteries, fixing electrical shorts, etc. etc.

In fact, the Husqvarna (sold also under the Gardena and Flymo brands) robotic lawnmower that I have has required less corrective maintenance than the old walk behind Briggs & Stratton powered mower that I still haven't had the heart to throw away.

That mower had issues ranging from a continuous problem with the traction drive belt (it's a heavy thing, and having it pull itself was a very desirable feature!) to a blade that was nearly impossible to take off, sharpen, and once put back never spun evenly, threatening to tear the engine off the plastic chassis!

Next to these issues, replacing the wheels when one began to fall apart, and regular blade replacement fade into the background, and both tasks are extraordinarily easy to complete. No expensive over-wintering costs, either, or replacing the engine oil, or any other of the messy jobs that you usually associate with lawn mower ownership.

However; there are a few things that I've noticed in the last three years, and are worth pointing out.

No More Moles!

The first thing that comes to mind goes back to a comment to a comment that I made back in 2014: to do with rodents eating the wire. At the time, one of my readers had pointed out that his Honda robotic lawnmower was suffering because foxes were eating through the guide wire.

My answer was to bury it deeper, thereby protecting it from ground level interference, but not from moles, which I also assumed would find the wire from time to time.

How wrong can you be?

It turns out (and this is just anecdotal - if anyone can back it up I'd be interested to hear their stories) that the number of moles in the lawn area, as evidenced by the (lack of) molehills has dropped to pretty much zero.

We used to have an issue with moles, and in the past I'd even installed one of those mole stop devices which send a subterranean pulse to warn the little blighters off, but it broke and never got replaced. 

Needless to say, the moles came back.

With the robotic lawnmower installed, however, they seem to have gone away again. I know they're in the area, because the field has been attacked, as have the neighbours' lawns (albeit to a lesser extent than before), but within our perimeter wire -- nothing.

There's a couple of explanations I can think of:
  • the irregular noise of the mower mowing creates vibrations (like the mole stop devices) that scare them away, or;
  • the electric fields made by the perimeter wire and guide wire are keeping the moles at bay.
Either way, the lawn looks better for not having any mole hills, and being greener thanks to the continuous mulching that tales place thanks to the mower's regular operation and small cutting length.

The Grass is Greener on All Sides

Just a small note here, but we have noticed an improvement (and being smart after the fact I wish I'd taken photos!) in the quality of the lawns. They are greener and more lush, presumably down to the mulching.

My walk-behind mower actually had a mulching blade fitted because I'm pretty lazy and didn't want to have to (a) empty the grass box somewhere, and (b) dispose of the grass. So, I just let the blade spin, reduce the grass clippings to dust, and let them fall where they were.

However, for this to be effective you need to mow the lawn every few days in the summer; especially because, a bit like hair, if you cut it regularly and take care of it, a lawn tends to grow faster!

Did I mention that I was lazy?

I'll admit it: to the cynic, this sounds like an expensive anti-mole and auto-mulching device, but the net effect is a healthier lawn that looks great.

My next project is to fit a couple of cameras so you can see it in action: you might even get to see it scare off a cat!

Thursday, 24 September 2015

The Robotic Lawn Mower Perimeter Wire Revisited...

Fitting a perimeter wire often requires breaking and re-connecting individual cables together; and when you buy a robotic lawn mower, they come with a selection of appropriate connectors. These, however, are quickly used up, and especially if the wire breaks (which it will do), leading to a hunt for replacement connectors.

Perimeter Wire & Guide Wire Breakage

For robot mowers that use perimeter wires, there are usually two ways that the wires are used:

  • as a boundary for the work area;
  • to guide the mower to the charging unit.

While any wire break is irritating, breaks in the boundary wire present more of a headache than the guide wire, as it involves investigating the whole loop. The instructions for the Gardena 40Li / Flymo 1200R show that there are three connection points on the base: two for the boundary wire and one for the guide wire.

There's also a light on the base (where the mower 'docks' -- you need to take it out to see the light) which has several states. States related to the boundary and guide wires are:

  • Green -- all okay;
  • Blue flashing -- break in the boundary wire;
  • Yellow flashing -- break in the guide wire.

Fixing the guide wire is easy enough, as you can trace it fairly easily (I made a plan of my own installation!), and splice the wires together.
Splice Clips

To do this, I use a splice clip, pictured here on the right, which costs about 2.5 EUR for 20 (less than 4 GBP) delivered, from online retailer Banggood.

These might not be water protected like the 3M ones that came with my Gardena 40Li, but they do the job adequately, and are a lot better than the 'sugar cube' type blocks that I was using previously, which tended to rust.

These clips can also be used to repair the boundary wire, once you know where the break is!

The instructions for doing this can be a bit confusing, but the diagrams in the user guide are pretty self-explanatory. However, since they require plugging a flying wire into the base unit, and then using it to test ever-increasing sections of the perimeter wire, I found using a terminal and spade connector made things easier.

I found these on Banggood at the same time as the splice clips (click here), for less than £2 per pack of 5. One of the 'spades'can be attached to the end of the flying wire, of which the other end is plugged into the base, in place of the regular other end of the boundary wire.

Terminal/Spade Crimp Clips
The t-connection bits end up on the boundary wire -- there being no way to take them off -- but are useful each time there's an issue.

As long as you remember (or write down) where they are, you can troubleshoot that much more easily, as well as 'shorting' between two points if you want to limit your robotic mower for some reason.

To do that, all you need is a bit of wire, the right length, with a spade at each end, and two points on the perimeter wire with a t-connector between which to put the flying wire. Now, when the mower approaches it, it will treat the new wire as if it is the boundary wire.

Simple!

Thursday, 17 September 2015

...And Then the Wheels Came Off!

It sounds like the punchline to a bad joke, but what do you do when the wheels come off your Gardena robotic lawnmower? The answer is simple, if a little long-winded: go back to the retailer and ask them to order new ones...

The Problem

The Gardena 40Li, Flymo 1200R, and Husqvarna 305 all look remarkably similar. In fact, I'd put money on the fact that they're all made by the same company, to the same design, which I'm fairly confident is Husqvarna itself.

To my knowledge, all of these share the same kind of wheels: a plastic hub and a rubber tread.

And here's the problem. After nearly 2 years of unbroken service (aside from over-wintering), my Gardena 40Li's wheels have come off.

Actually, it's just the rubber tread that has become worn out, and I found it lying on the damp lawn, with the poor mower comically pirouetting with one tread-less wheel being dragged around by the other, rubberised one.

The solution ought to have been simple -- in this day and age, surely it's possible to order Husqvarna parts online? Unfortunately, it proved to be a bit more tricky than I'd thought.

Out With the Old Wheels

Without the rubber tyres, not only can the mower not mow efficiently, but it also can't dock itself for charging, since the designers decided that the best way to achieve this would be to reverse the mowers onto the outdoor charging stand.

This means that they have to spin around (always turning the same way) and by coincidence, it looks rather as if it's the outside wheel that has come off worse and eventually failed.

So, repair is out of the question. De-rubbering the wheels is out of the question. Perhaps there's a DIY solution (let me know in the comments thread!) but the most obvious option is to replace the rubber treads.

In With the New Wheels

However, it seems that someone on the design team has realised their error with the wheels, and rubber treads aren't available, but nice, shiny, moulded plastic (with treads) wheels are.

They cost me around 25 EUR from the dealer, for a pair, and took a while to arrive -- they were permanently out of stock at the central stockists -- but when they did, they proved easy to remove and replace.

If you look at yours, you'll see that there are three torque type screws to remove, per wheel, which can be a bit tricky, due to the angles, but it can be achieved without dismantling the mower itself. This may not be the case for the original Husqvarna 305, but the Flymo 1200R and Gardena 40Li succumb to the direct approach easily!

The new wheels came without screws or washers, so you'll want to keep those and not throw them away when you dismantle the old wheels.

Besides the blades, and the occasional accident with the perimeter wire, this is the first 'major' part of the mower I've had to replace in 2 years, which makes it an immediate improvement over the old Wolf Garden manual motor-mower I used before, which suffered wheel-failure (traction belt) in the first year, and needed to be annually maintained by the local dealer to keep it working properly!

The next thing I expect to go will be the battery; I'm not sure what the lifespan of these is supposed to be, but we've already noticed extending charge cycles, and diminishing mowing times. Of course, without an actual measurement/download facility, that's anecdotal, but to be expected.

Still, being able to change the wheels myself, and as easily as changing the blades (despite having to shop-order them) removes another of my initial concerns about owning a robotic mower.

Thursday, 26 September 2013

The Robomow RL 555-HD Lawnmower : A Robotic Automatic Lawnmower with a Few Issues!

Firstly, a disclaimer : I don't actually own one of these, but have spent time gathering the opinions of others, and hopefully can point out a few of the glaring omissions in the design of the mower, whilst helping out anyone who owns one (or something similar) and is having issues with it.

What we have is a re-branded Husqvarna (marketed by Gardena on the continent, and Flymo, I believe, in the UK) and, for the record, I'm pretty happy with it.
The Robomow RL 555-HD

The first issue is that the 555 needs to be indoors in order to be charged. This doesn't make sense for something that ought to be automatic in every sense. In fact, I was hard pressed to find another robotic mower that has the same requirement.

Luckily, Robomow have fixed this design fault in other models, such as the RL2000 and the aptly named City 110 (it won't mow anything bigger than a 'city' lawn!)

The 555 has, instead, a remote control that is supposed to be used to drive it out of the garage and onto the lawn. That feels a bit like pushing an old fashioned lawnmower (sorry, traditional lawnmower) out onto the lawn, and not what you'd expect from a 21st century invention.

Once on the lawn, the 555 navigates using a perimeter wire. This is the preferred method of enclosing mowing zones, and used by Bosch, Flymo, Robomow, and others. Usually it works well, but when it doesn't it's usually because there's a break in the wire.

These can be hard to track down, and there's no real substitute for going along the wire (a pain if it's been dug in) and trying to find the fault. However, that's a problem shared by all the current market leaders.

A word of advice - first check that the connectors are still plugged in okay by unplugging and re-plugging them into the base unit. Then, if that fails, change the connectors (I've left about 20 inches of cable after the plugs just so I can do that!) just to be 100% sure it's the wire, and not the plugs.

The plugs are outdoors, so it could just be that they have become full of water, eaten by pests, or otherwise damaged or moved.

The mowing action is also the same as any other automatic robotic lawnmower in that they don't pick up after themselves. They're designed to be run frequently, clipping the ends off the grass, and letting it drop down onto the lawn, thereby fertilizing it (the mulching idea.)

Now, the Robomow 555 has two issues here.

The first is that it is heavy to take from the garage to the lawn, and so having it mow every day is going to become a problem over time. Secondly, there are issues with the Robomow and wet grass, according to an Amazon review. Apparently, it doesn't cope well with it.

This could be an issue, because mulching is best done when the grass is damp, according to one of my fellow mower-owners. But, since I don't own one, I can't comment further.

All in all, the main downfall of the 555 is that it can't be charged outside, which removes one of the central pillars of the buying decision : that it be convenient. To give them credit, the manufacturer has spotted this, and other models are self-charging, outside.

Tuesday, 10 September 2013

Cheap Automatic Robotic Lawn Mower Solution

I'm not sure quite how safe this is, and it certainly won't stop if it comes across a flower bed, child, or family pet. Nor will it return back to its base to get more fuel if it runs out (probably best, though) and can only really cut a circular lawn.

However, it is an ingenious idea, if you have a normal lawn mower, and are willing to keep an eye on it!


Probably best not to leave it alone for too long, wouldn't you say?