Showing posts with label robomow. Show all posts

Monday, 22 May 2017

Robomow RX12U The Affordable Robotic Lawn Mower

Unusually for me, I'm going to lead with the price: £499 on Amazon.

I'll just let that sink in.

At that price -- which I'll admit is still a lot of money -- the Robomow RX12U begins to compare pretty favourably with a regular lawnmower.

It looks pretty good, the charging station is low profile, and you even get a natty app so you can talk to it from your mobile rather than having to bend down over a badly lit LCD screen.

Okay, so it won't mow the largest of lawns. In fact, it's limited to something between 150 and 250 square meters of grass.

Part of the reason for this limitation is that it can only mow for an hour and a half before needing a full 16 hours to recharge itself.

And, obviously, with these limitations, it also prefers a squareish lawn without too many complicated turns. Otherwise, it's going to miss areas repeatedly, and result in an uneven cut. The grass, in the growing season, can get quite unruly after only a few days.

Still, the result on a regularly shaped lawn of about 200 square metres is likely to be pretty good. The novel design means that it will go over the edges, too, so you'll get a crisp finish. Just make sure that you follow our Perimeter Wire Tips and Tricks, to get the best results.

Specifications and Installation


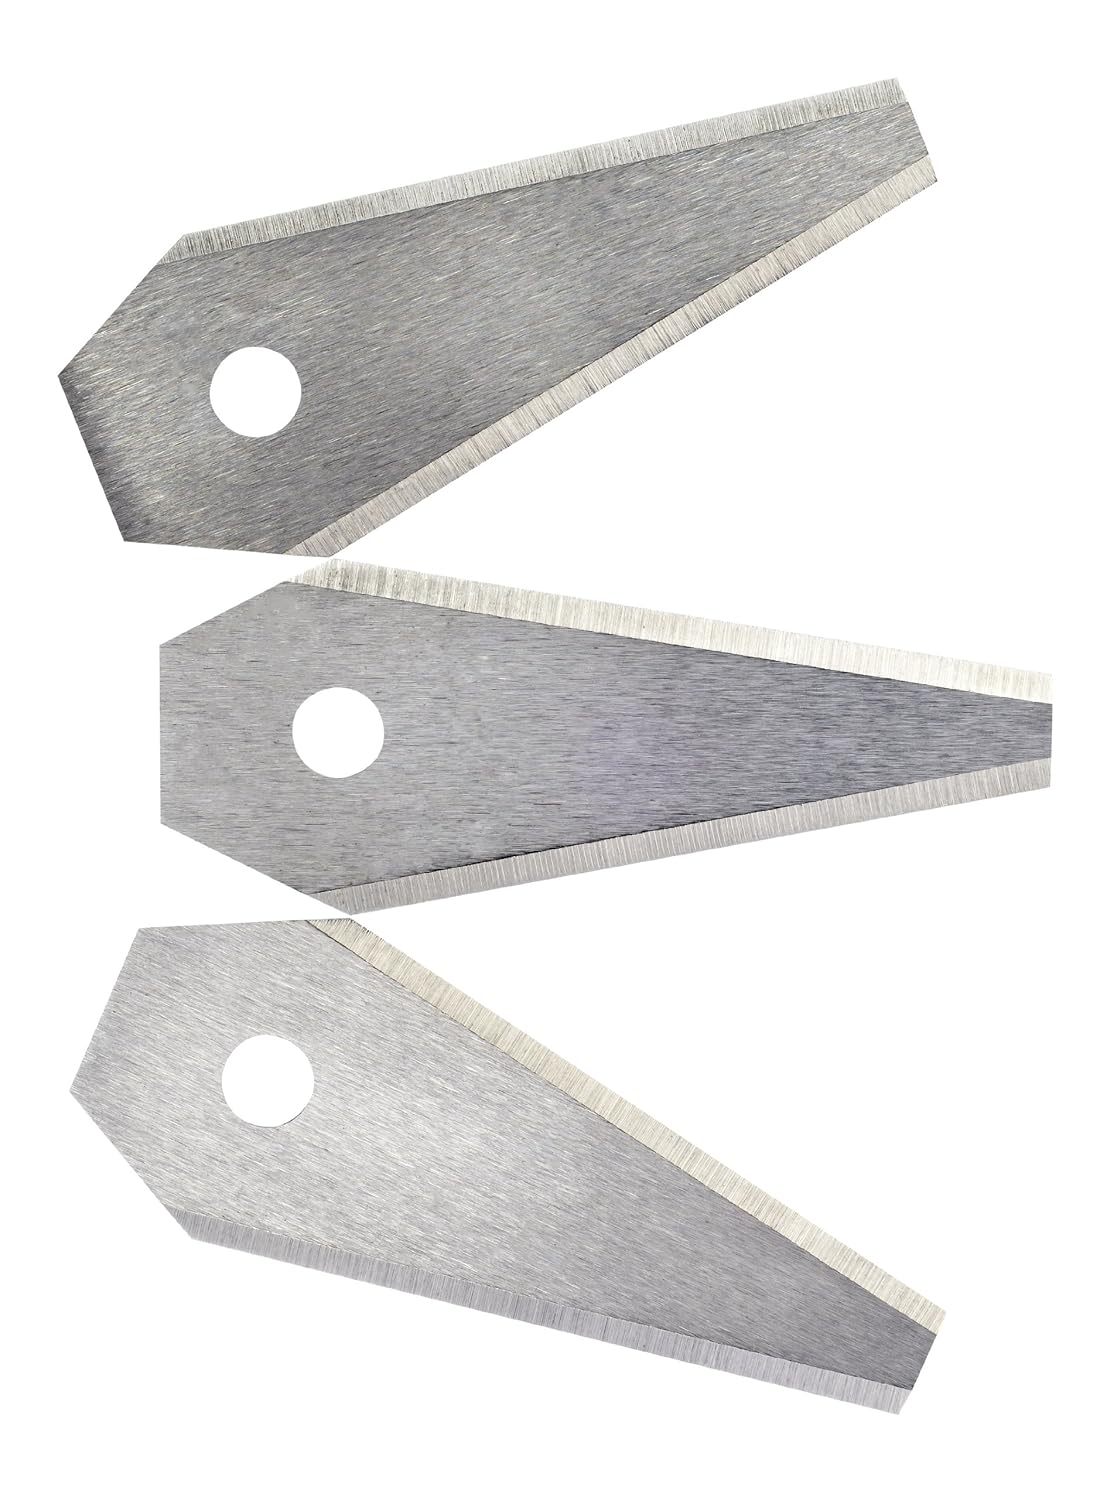
For the technically minded, the cut is provided by a single blade, and replacing it doesn't look to be a cheap: going purely on the price of blades for other models (the RM, for example) they seem to cost between £35 and £60. They do, however, look pretty solid, unlike the Indego and Automow (Flymo) variants.

Installation looks easier than most, too, since there's no return wire, and the docking station just sits on the perimeter wire. Now, when it comes to fault finding, I'm a big believer in using the return wire to test for breaks in specific sections (see The Perimeter Wire Revisited), but there's no reason that you can't use the perimeter wire loop instead, for small lawn areas.

One key drawback is that there's no anti-theft device fitted on the RX12 series, which will concern some people: especially as it doesn't seem to be locked to the base unit either, like some of the other brands, and doesn't need to be unlocked with a PIN, either.

Robotic Mower Alternatives


So, aside from building an Arduino based robotic lawn mower yourself (by the way, that's not a cheap option, which I'll explain in a future article), what are your alternatives?

It turns out that if you're willing to go with an older generation, admittedly bigger, bulkier (and uglier) than the little Robomow, for £100 more, you can get the Flymo 1200R.

Here's some advantages: the blades are cheaper to replace, there's a full anti-theft device (beeping, PIN codes and coded base station), it has a guide wire, so you can tell the mower to start at a specific place, and it can always find its way home, and it doesn't need 16 hours to charge.

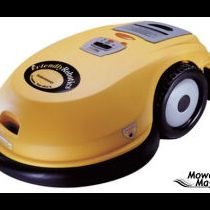
In fact, our Gardena R40Li, which is the same machine, doesn't seem to need much time at all to recharge, and is almost constantly buzzing quietly around the lawn. Okay, so it's based on the Husqvarna Automower 105 style technology, but there's on big advantage that comes with it: Husqvarna invented the mass market robotic mower, and is still probably the market leader in Europe by some margin.

So, if you have a small, enclosed, secure lawn, go for the Robomow. Otherwise, that big orange robot represents a very good alternative, and at almost half price on Amazon may just be an opportunity that's too good to miss!

Tuesday, 8 October 2013

What Are the Differences Between the Major Robotic Lawn Mower Brands

Most robotic lawnmowers operate on the same basic principles with the same key features:

  • mulching blades (small amount of grass cut, drops onto the lawn)
  • powerful wheels (to deal with slopes)
  • sensors (to avoid obstacles)
  • guide wire (to keep within one or more zones)

However, within these principles there is scope for quite a lot of variation, and some of the variations serve to differentiate the models on offer.

Of course, as always, one of the biggest differentiating factors is price. Across the ranges, prices can triple, so it's worth knowing what you are (potentially) getting for your money.

Different Blades

Underneath any lawn mower, be it a Flymo hovering mower, or a Briggs and Stratton powered petrol guzzling traditional push around mower, there are one or more blades.

Traditional mowers are built to cut through long grass that has either been neglected over the off-season, or needs cutting every week (and only gets cut once a week) with the clippings being taken off to be disposed of.

Robotic mowers are designed for one purpose - to cut automatically and regularly, and drop the grass tips down onto the lawn to mulch it; automatically providing nutrition as well as keeping the lawn trim.


Most of the mowers on the market have multiple blades, held in place by a screw, which spin around at great speed, clipping the tips of the grass, and then chopping those tips into a fine dust.

Above right, are the blades for a Bosch Indego mower, which are long and thin.

To the left are the blades from a Gardena / Husqvarna, and Flymo mower, all of which seem to be either manufactured by Husqvarna in different liveries, or made under license.

Then, there are the single blade varieties, such as those used by RoboMow models, as pictured on the right.

So, which is the best?

Naturally, each manufacturer will have their reasons, but from the point of view of the mulching process, I have an idea that the loose blades might provide a better cutting action.

However, they are also more likely to snap (it's happened twice on my Gardena/Husqvarna) and fall off. I have a sneaking suspicion that the single piece blades are less likely to fail, but more likely to do damage should they come off.

Different Wheels

There are really only two choices for wheel arrangements - thee or four wheels - but again there is a surprising amount of variety across brands. Originally, Husqvarna went with a three wheel model, with the rear single wheel being smaller, and on a pivot.

This is very similar to the Flymo wheel arrangement, pictured on the left.

It has been replaced in more recent models with a version that has the smaller wheel at the front, like the Bosch Indego, and which, like the Bosch also enters the charging station front-first as opposed to back-first like the smaller Flymo models

Different Control Styles

All mowers need to have sensors to avoid hitting obstacles (like dogs, cats or trees!) and these are usually in the form of bumpers. Bumpers are reliable in a way that, for example, an ultrasound sensor might not be.

Next to the bumpers are different remote control styles - some mowers have a control pad that lets the owner steer the mower from zone to zone, while most just take themselves to a new zone by following a guide wire.

The guide wire is accompanied by a perimeter wire, which restricts the mower to the current zone. Many manufacturers also sell a kit to add new zones, so that the mower can be used on a greater area than originally installed.

Finally, some more recent models are starting to use GPS (Global Positioning System) antennas to help map out the space that needs to be mowed, and also to make sure that the whole area has been cut.

This last is important because, like some robotic vacuum cleaners, most of the models on the market tend to mow in a random fashion, over an extended period of time, and use this to make sure that the whole lawn has been cut.

Some of the more expensive models also have other cutting modes, so that they can be adapted to different shapes of lawn. So, if you have a lawn that is (a) large and (b) has many obstacles as well as (c) being an odd shape, it's probably worth spending a bit extra to get a more clever mower.

One last differentiating factor is the charging station. While most manufacturers have spotted that this needs to be weatherproof and located outside, some of the cheaper models still have an indoor charging station and require the mower to be carried or driven from the garage to the lawn.

Clearly, in the interests of automatic mowing, and ease of use, an outdoor charging station is the way to go.

Armed with this rundown of the various different features of automatic robotic lawn mowers, you should now be ready to choose from the models on the market, and join the rest of us who can sit back and watch whilst our lawns are carefully and immaculately mowed!

Thursday, 26 September 2013

The Robomow RL 555-HD Lawnmower : A Robotic Automatic Lawnmower with a Few Issues!

Firstly, a disclaimer : I don't actually own one of these, but have spent time gathering the opinions of others, and hopefully can point out a few of the glaring omissions in the design of the mower, whilst helping out anyone who owns one (or something similar) and is having issues with it.

What we have is a re-branded Husqvarna (marketed by Gardena on the continent, and Flymo, I believe, in the UK) and, for the record, I'm pretty happy with it.
The Robomow RL 555-HD

The first issue is that the 555 needs to be indoors in order to be charged. This doesn't make sense for something that ought to be automatic in every sense. In fact, I was hard pressed to find another robotic mower that has the same requirement.

Luckily, Robomow have fixed this design fault in other models, such as the RL2000 and the aptly named City 110 (it won't mow anything bigger than a 'city' lawn!)

The 555 has, instead, a remote control that is supposed to be used to drive it out of the garage and onto the lawn. That feels a bit like pushing an old fashioned lawnmower (sorry, traditional lawnmower) out onto the lawn, and not what you'd expect from a 21st century invention.

Once on the lawn, the 555 navigates using a perimeter wire. This is the preferred method of enclosing mowing zones, and used by Bosch, Flymo, Robomow, and others. Usually it works well, but when it doesn't it's usually because there's a break in the wire.

These can be hard to track down, and there's no real substitute for going along the wire (a pain if it's been dug in) and trying to find the fault. However, that's a problem shared by all the current market leaders.

A word of advice - first check that the connectors are still plugged in okay by unplugging and re-plugging them into the base unit. Then, if that fails, change the connectors (I've left about 20 inches of cable after the plugs just so I can do that!) just to be 100% sure it's the wire, and not the plugs.

The plugs are outdoors, so it could just be that they have become full of water, eaten by pests, or otherwise damaged or moved.

The mowing action is also the same as any other automatic robotic lawnmower in that they don't pick up after themselves. They're designed to be run frequently, clipping the ends off the grass, and letting it drop down onto the lawn, thereby fertilizing it (the mulching idea.)

Now, the Robomow 555 has two issues here.

The first is that it is heavy to take from the garage to the lawn, and so having it mow every day is going to become a problem over time. Secondly, there are issues with the Robomow and wet grass, according to an Amazon review. Apparently, it doesn't cope well with it.

This could be an issue, because mulching is best done when the grass is damp, according to one of my fellow mower-owners. But, since I don't own one, I can't comment further.

All in all, the main downfall of the 555 is that it can't be charged outside, which removes one of the central pillars of the buying decision : that it be convenient. To give them credit, the manufacturer has spotted this, and other models are self-charging, outside.

Wednesday, 11 September 2013

Installing the Perimeter Wire for your Automatic Robotic Lawnmower

One of the trickiest tasks when you first install your automatic robotic lawnmower is getting the perimeter wire right.In fact, there are usually two wires:

  • perimeter wire round the outside (stops the robot leaving the lawn)
  • guide wire (helps the robot get back to the charging base)

We'll deal with the guide wire in a later article, for now let's look at the perimeter wire. The easiest example is a rectangular lawn.

Placing the Perimeter Wire Around a Rectangular Lawn

Many lawns are basically rectangular - even our lawn, which has two zones (front and back) and an 'upper back' lawn, some swings, raised flower beds and a patio, is essentially rectangular.

The only concerns are:

  • having enough wire
  • what to do about corners

The first is easy enough - just measure the perimeter, and buy more wire if necessary! The second needs some explanation. The picture on the left shows my initial installation attempt, next to the patio.

Incorrect Perimeter Wire Placement
The blue line shows the wire, and you can assume that the area to the left and below the picture are out of bounds for the mower.

The red line shows the path that the mower consistently took. The result was that it would keep stopping with an "Outside mowing area" error!

In the manual, the instructions were quite clear to avoid sharp corners, but somehow I ignored this advice.

Clearly, you do need to follow it, so I adjusted the wire to look like the picture below.

Now, the robot doesn't exit the mowing area, and all is well. Of course, I had to buy extra clips because it's a more complex shape, but Husqvarna sells them in packs of 100, so although it was an extra expense, it wasn't insurmountable.

Correct Perimeter Wire Placement
Plus, it was cheaper than replacing the blades which were grinding themselves on the coping that runs around the edge of the lawn!

Another point to watch when laying the perimeter wire is the distance between the wire and the edge of the lawn.

The temptation is to get as close as possible to the edge, to avoid having to use a strimmer or edge cutter, but it's a false economy, as the robot needs space to turn, and not leaving enough space means that it will also exit the mowing area.

For those who have a raised edge, and are using that to limit the robot, that's fine, but it does cause wear and tear to the bumper.

Of course, if you are lucky enough to have a robot mower that uses ultrasound, that doesn't apply!

The Perimeter Wire and Obstacles

It is also possible to branch the perimeter wire out, and use it to go around an obstacle in the lawn (such as a valuable bush, or tree). The only thing to watch is that the wire is kept close to itself when it is doubled back (to return to the perimeter) so that the robot ignores it. Otherwise, it can get stuck in an area bounded by the outgoing wire, and the edge of the mowing area.

My preference was to build a small wall around things like shrubs and trees, because:

  • it would take a lot of wire to go round every obstacle
  • it increases the risk of problems with the wire breaking.

Again, following the instructions is paramount!

Setting Up The Perimeter Wire with Multiple Zones

Our lawn is essentially split into three parts, two are connected by a passageway, but the other is at the front of the house and not reachable by the robot mower automatically. We carry it between the back and front zones, manually!

The front zone is created by a perimeter wire that is taken off the main charging station, and runs completely around the lawn, bounding it.

At the back, the perimeter wire runs around the edge of the first zone, and then along the edge of the passageway, around the second zone, and back to the charging station.

The gap between the wires at the closest point of the passageway is less than a meter; this isn't ideal, as the robot sometimes doesn't quite make it through (in either direction) and therefore:

  • gets stuck in the second zone, or
  • never mows the second zone!

I'm still looking for the best solution for this, but I suspect I'll end up widening the passageway. I'll keep you posted...