Showing posts with label perimeter wire. Show all posts

Friday, 21 June 2019

Robotic Lawnmower Perimeter Wire Installation Tip

I have written on this topic before, in my popular Robot Lawn Mower Perimeter Wire Repair Kit post. Regular readers will be happy to hear that the chickens are still causing chaos, and so it looks rather like I'll have to reinstall the wire after all.

Before I get around to that, my ongoing DIY projects have meant that, at the very least, I've had to move some wire so that I could install some decking.

Moving the Perimeter Wire

Why not just leave the wire there and let the mower bump up against the fence?

This question was from my wife, and it's a good one. The thought had occurred to me, too, but then I remembered the palaver I had to go through to replace the suspension rubbers (see my Damper Picture and Repair Instructions) and decided to try and preserve them a little longer.

I spun the mower onto its back over the weekend, and noted when I tried to unscrew one of the rubbers that it was twisting and flaking, so it looks like it's on the way out as it is, so probably best not to take any chances.

Of course, I couldn't find the wire, since I never did buy that wire detector for perimeter wire I promised myself, so after a bit of trial and error (okay, I could have just let loose the mower and noted where it turned around, but I didn't think of that), I finally located the cable and started digging.

Naturally, I cut through it by accident, despite taking as much care as I could.

As I was moving the wire, which meant shortening its path, a point occurred to me.

Adding Coils of Wire to Improve Repairs

I could have chopped off the excess wire and thrown it away. However, instead I wound it around the pegs; not all of it, just a couple turns here and there.

Why?

Not for any strange electrical reason. Simply this: when I next cut through the wire, as will surely happen, at least I'll have enough slack to make a decent fist of the repair.

There's nothing worse when you're trying to repair a cut wire than the ends not meeting, no matter how hard you tug them. This simple tip, winding around every other peg, means that you should always have wire available.

I can't believe I didn't think of it before; but I didn't. And, you might not have. So, I'm sharing it to help you out; let me know if it was helpful at all in the comments below.

Monday, 17 December 2018

My 2018 Robot Mower Accessory Wish List

As it's winter time again here in the Northern Hemisphere, my thoughts turn to hibernating my robotic lawn mower and carrying out essential maintenance on the perimeter wire.

Even with the addition of chickens, it's holding up well, but I've noticed that they've managed to unearth it in several places. I'm holding fast with my decision not to concrete over the wire, though, preferring instead to put some small stones on top that the mower can roll safely over instead.

The reason for this is that if you cement the wire in, and it breaks, it's going to be hard to find the place where the break occurs, using the usual approach to repair a perimeter wire.

Repair Kits

First off, I've found a perimeter wire repair kit that has all the bits you'd need to carry out this essential maintenance:

  • cable (5m);
  • pegs (x10);
  • 'proper' cable connectors (look like four of the 3M ones).
While this is a great value package, it leaves one aspect out: locating the break in the wire.

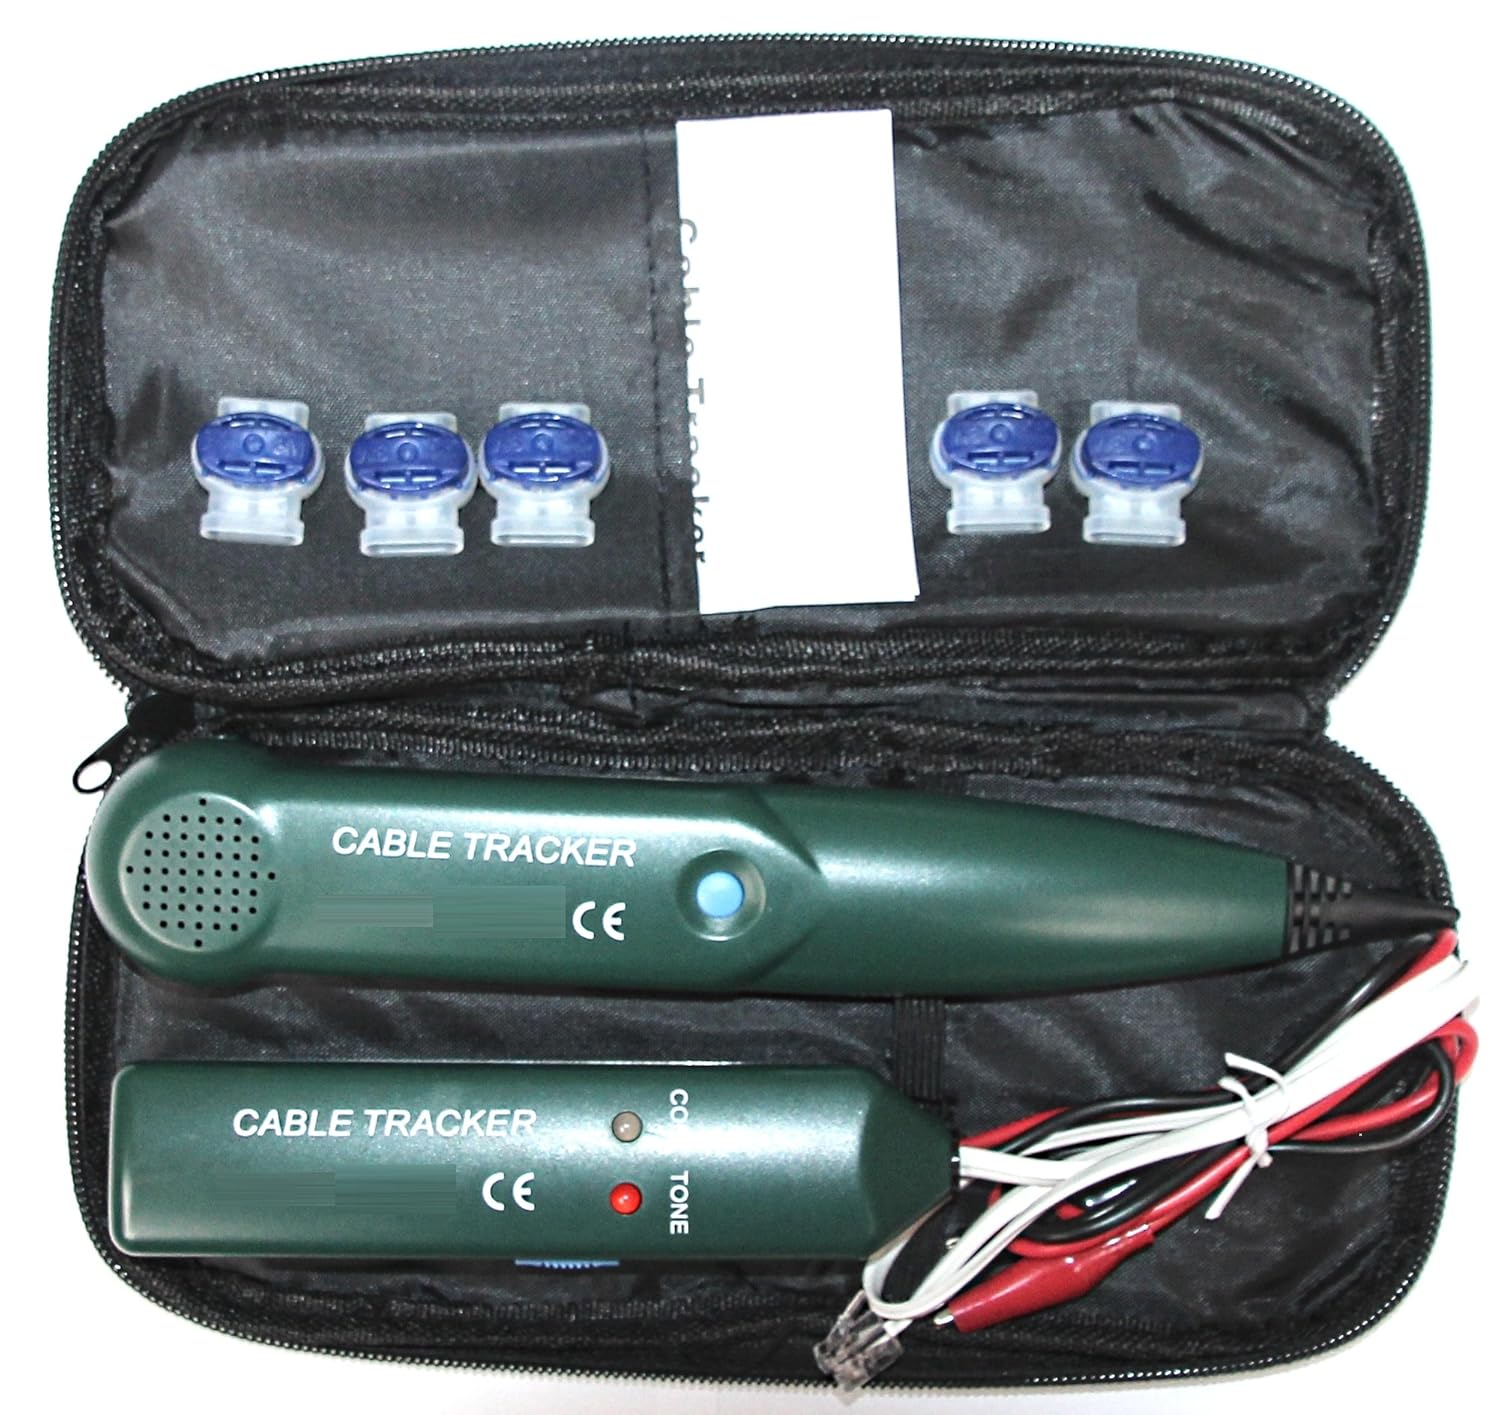
Regulars at the blog will know that I have a tried and tested method for finding perimeter wire breaks, but if Santa is kind this year, I may well have an automated alternative.


It's from genisys, maker of replacement blades and other accessories, and promises to take the pain out of finding the break.

Fair warning: I have no idea how effective it is, yet. I also don't immediately see how it works, but it looks similar to others that I've seen with a tone generator and detector.

An example is this one from Paradise Robotics (link goes to instructions PDF) and confirmed my initial idea that it works pretty much in the same way that the manual search and fix works, except that you don't need to unearth your cable!

Also, the single review on Amazon indicates that the instructions are less than perfect; the initial opening line of the Paradise Robotics instructions would seem to confirm this: "Please follow these instructions because you may find the instructions in the manual confusing."

The Cable Fracture Search Device comes in on Amazon at under £30 and as long as Santa feels generous, you'll get a review of it in the New Year. If you can't wait, click the link, and stop by here to let us know how you get on!

Blade Kits

Blades are always good to have around: certainly in my garden with all those protruding anti-chicken stones, falling branches, and so on, blades get broken quite frequently.

Following the manufacturers advice to the letter, I usually replace all three blades and screws at once to avoid unbalancing the spinning mechanism. Now, this might be overkill, but I've had 5+ years service thus far with nary a problem.

So, I was looking for some replacements recently, and happened upon a great deal over at Amazon UK: 30 blades for under £8.


Then I looked at the promo pictures.

At the bottom was the one you see over there on the right. Now, I'm not being funny but I'm not sure the advertiser necessarily understands what kind of mower the blades are for!

Unless, of course, you know any different, I'd say that the mower in the picture doesn't use the blades being advertised.

Again, subject to Santa's generosity, I'll provide a full review of these relatively cheap replacement blades in the New Year.

For a quick price comparison: Titans are about £14 for a pack of 12, and last year I did a full blade price analysis which still looks more or less right when compared to today's market. So, 30 for £8 is almost unbelievably cheap.

Other Robot Mower Accessories

From the low end to the high end, now: the traditional big ticket item of the season is the robot mower shelter. Typically, the branded ones are pretty pricey -- somewhere around the £130-£200 mark -- and aftermarket no-brand shelters from £50-£75.

That was the last time I looked (link goes to full comparison), and things haven't moved on much.

With that said, let's go from cheap to expensive...


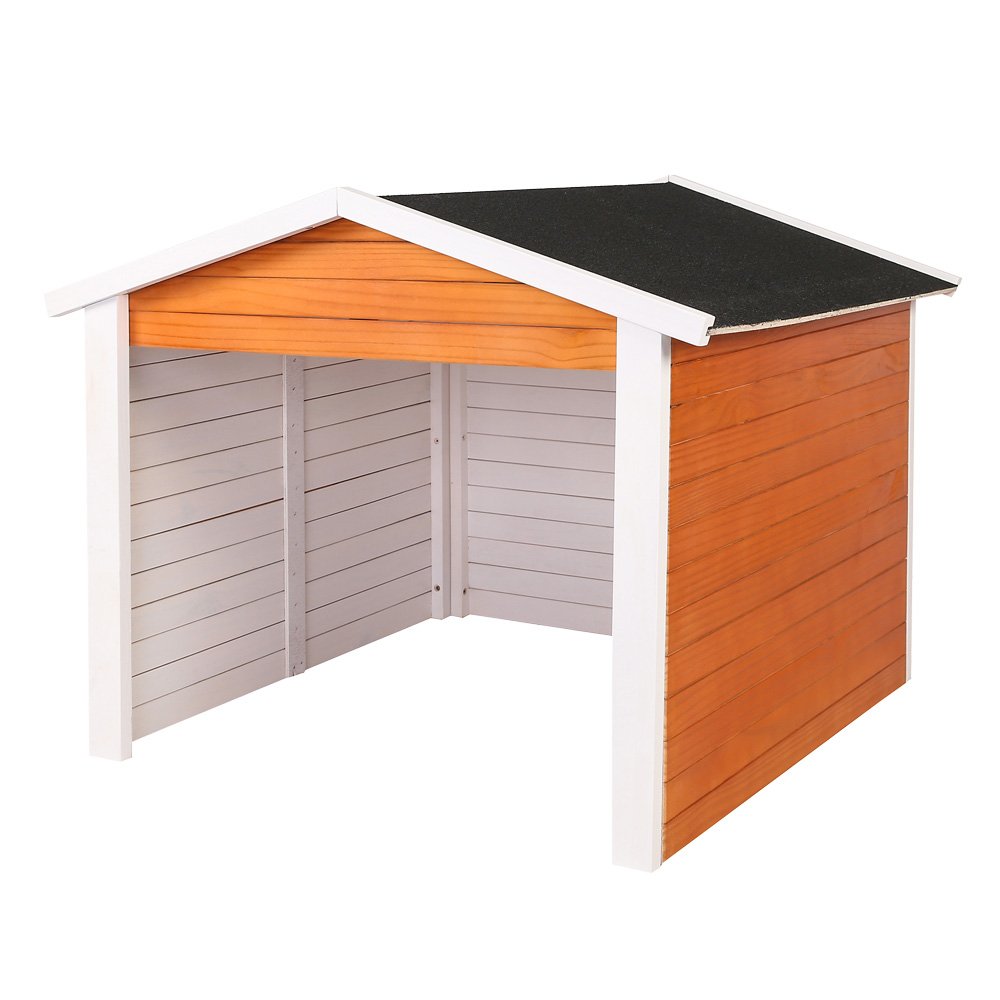
Wiltec have a couple on Amazon, the one pictured here is the basic-looking than the one I'd originally selected, but has four stars rather than two.

What I like about this robot mower shelter is that it's easy to modify: the reviews mention a few hacks that have been required to allow access to the cables via the back, for example.

They're both £90 or thereabouts, and made in Germany, which seems to be the place to go for aftermarket robotic mower accessories.

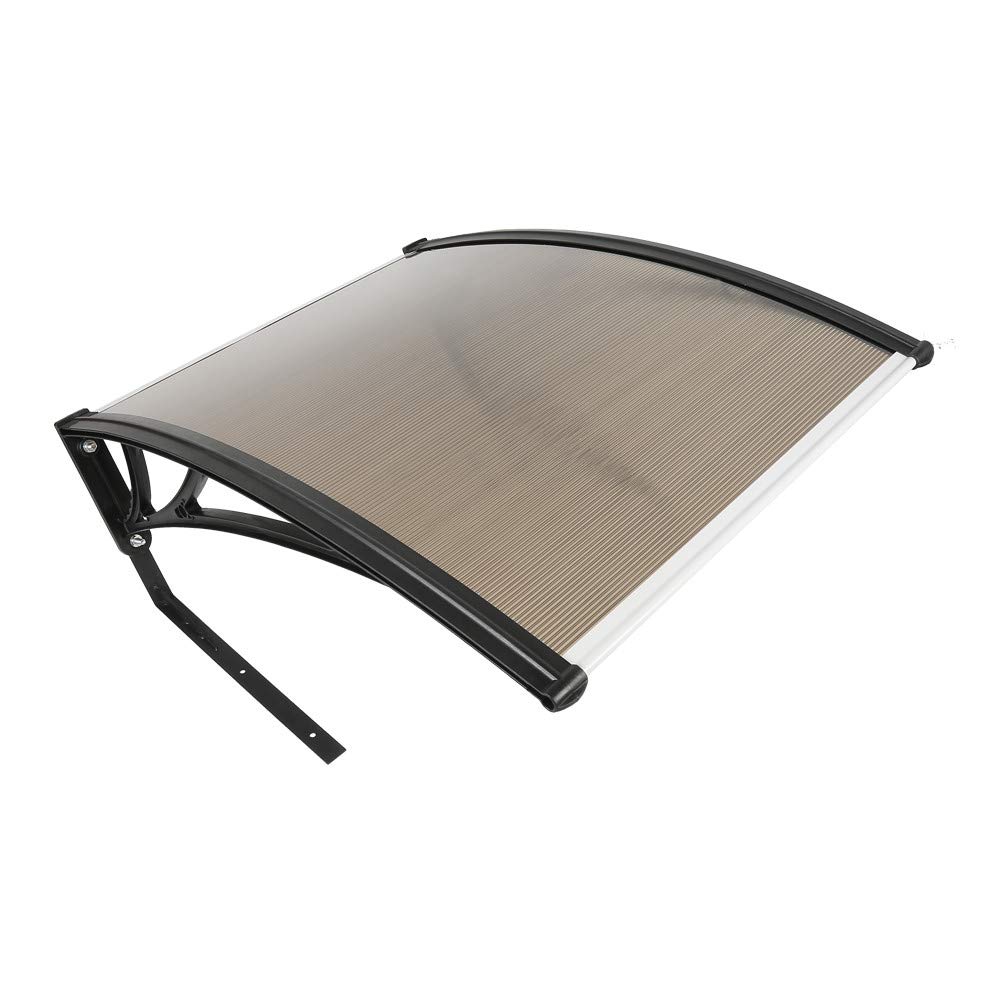
Next up is the Turefans Shelter for Robotic Mower, which regular readers will find looks familiar.


I believe that it comes as a flat-pack, which for under £50 isn't much of a surprise.

One thing I like is that it provides easy access to the back (and wires) of the mower docking station. What I like less is that it leaves the back and sides exposed to the elements.

The manufacturers advice for the R40Li (1200R) doesn't mention a need to protect the electrics, but in my opinion it's always better to do so.

Subsequently, my home-made shelter looks more like the Wiltec one above. Being wood, though, it's starting to suffer. Being home-made, it's also starting to fall apart!

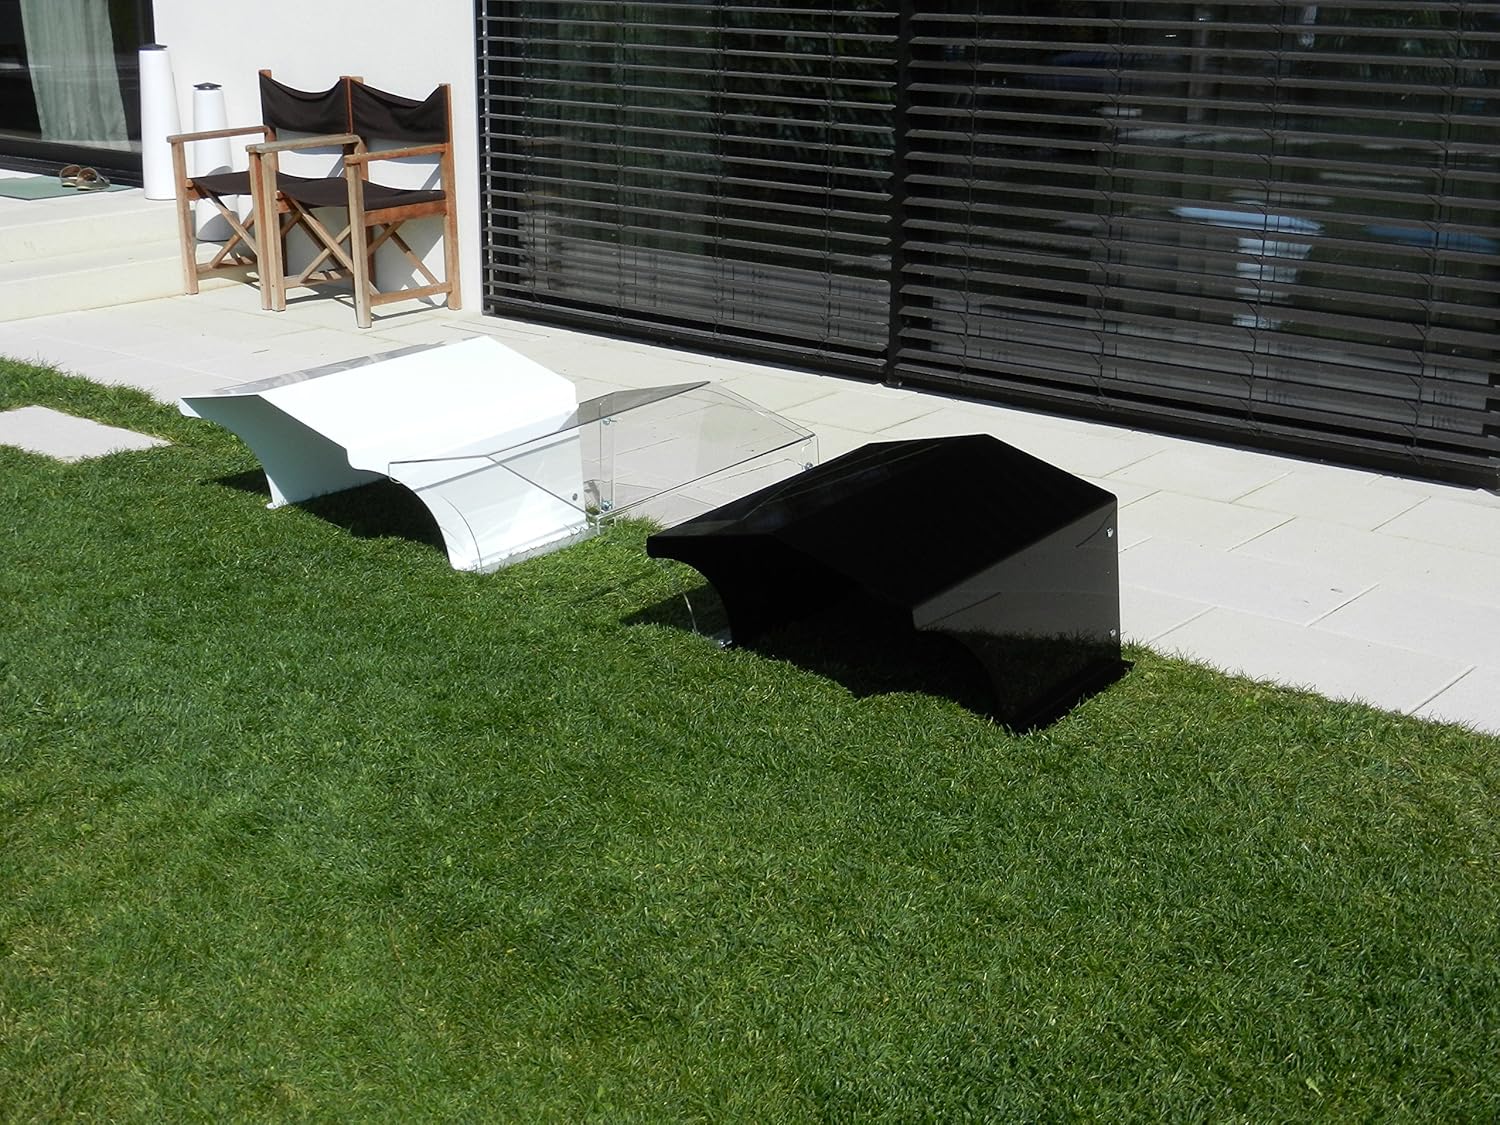
Which brings me to the final robot mower shelter, from German maker LED Design Shop.


It's actually called a Robot Lawn Garage, a suitably upmarket sounding moniker for a £200 shelter.

They're available in 2 sizes, and as in the photo, three colours: black, white and transparent.

The material appears to be some kind of high impact acrylic, with, according to the description, a 30 year guarantee.

Here again, my only real issue is getting to the back of the mower, where the connectors are. The base unit will fit under the shelter, and the rear panel doesn't quite touch the ground, leaving space for the wires to trail out of the back.

However, if you ever want to get at the base unit, once the shelter is installed (to clean the contacts for example), it'll be pretty tricky.

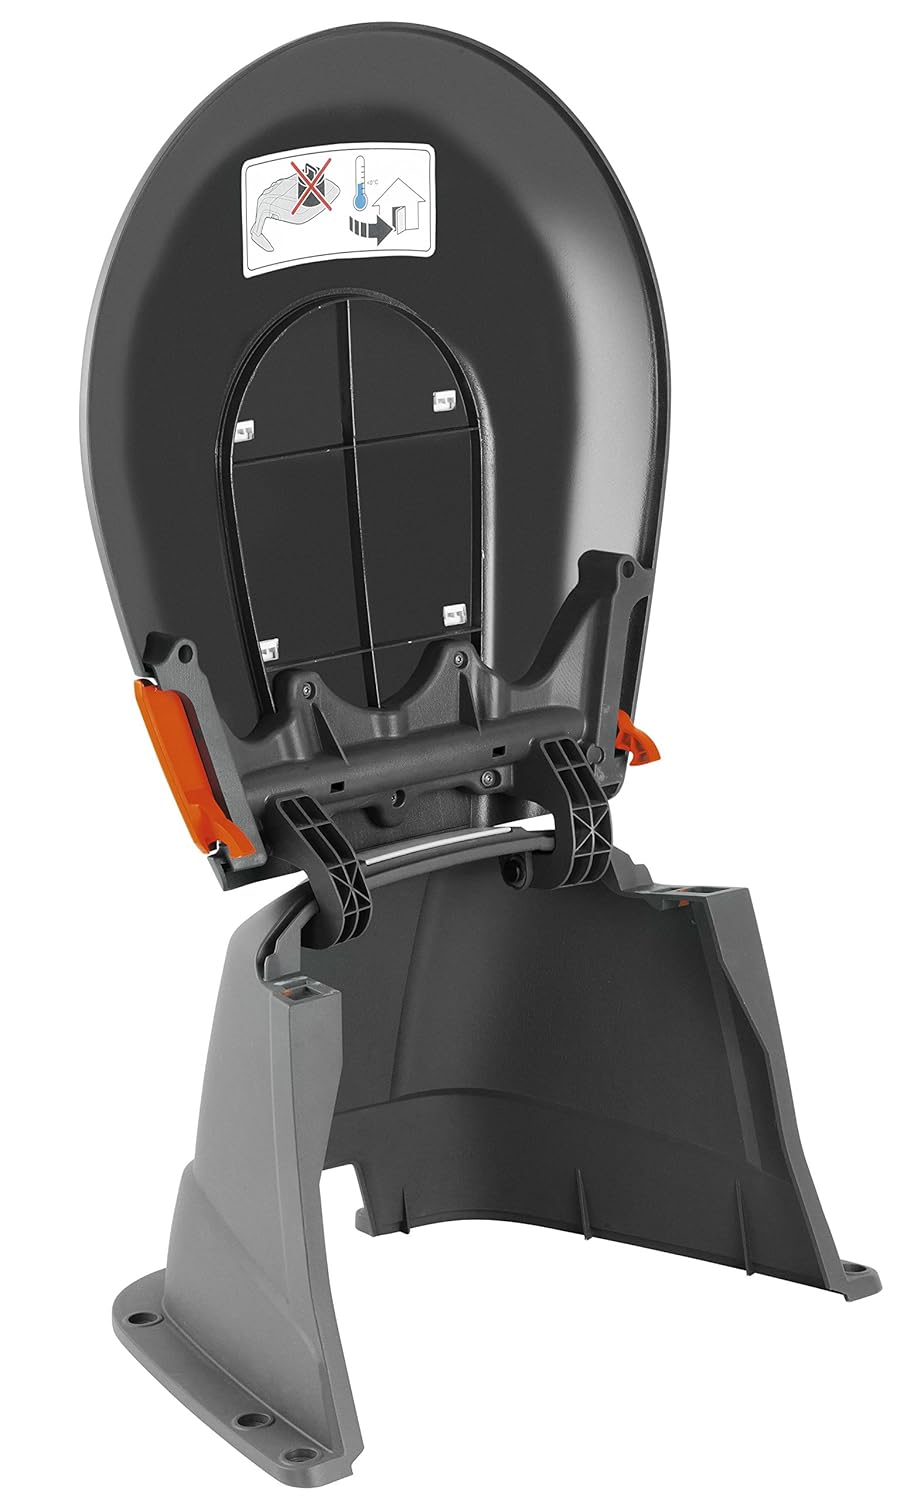
Compared with, for example, the Sileno City shelter from Gardena (pictured), which flips up like a toilet seat (forgive the analogy), most of these shelters seem to be missing a trick.


When you'e paying sub-£50 that's forgivable, but not if you have to part with almost £200. Perhaps just a hinged door at the back, or a slide-off roof could be the answer.

Any budding designers out there, take note!

Anyway, I'm not going to rely on Santa to drop one of these in my stocking; I'll be on the hunt into the New Year to see if I can pick up a bargain in the sales. Failing that, I'll be back out in the garage trying to cobble up my own shelter come Springtime.

Happy Holidays!

Tuesday, 24 April 2018

Robot Lawn Mower Perimeter Wire Repair Kit: Tips & Product Advice

While researching an article about aftermarket robot mower blades I cam across a pack that had all the bits in one place: screwdriver, blades and new screws. Now, it seemed obvious to me that the next most obvious kit would be a perimeter wire repair kit, but I've not yet found one.

So, here is my own list of things that you would need to put together such a kit, based on bitter experience of:

  • chickens digging up the wire;
  • having to move the wire due to 'garden redesign';
  • natural breakage due to corrosion;
  • expansion of the mowing area, etc.

Even once you have installed the mower and its perimeter wire, it is likely at some point that it will break, be broken, or you'll have to move it. So, it's sensible to have a troubleshooting and repair kit to hand.

Wire & Quick Splice Connectors

The first thing to note is that while there are many different vendors of wire, with each specifying the make and/or model of mower that they should be used with, I have had good results with both single and multi-strand off-the-shelf wire.

Single strand (solid) wire can be easier in some cases, bit is very rigid: originally my own Gardena (Flymo / Husqvarna) mower came with a supple, green, multi-strand cable. However, I have since extended with a mix, and also carry a 'flying wire' for use in troubleshooting breaks in the perimeter, which is single strand.

For those who want some inspiration, Amazon carries a number of different types of wire specifically made for use with robotic lawn mowers.

One of the more specific things I have in my repair kit is called the "quick splice" connector.

Pictured on the right is the type that I favour -- these are used to clip onto the perimeter wire at a specific point, and then attach a 'flying wire' via a spade connector.

In my case, their purpose is not as a permanent way to connect the wires together (see below for that) but when I need to find a break in the wire.

Often, I'll leave them in place as it's more hassle than taking them off, and I suspect that removing the clip from the wire may leave it open to corrosion.

On the other hand, five years have gone by since I hooked up the first one, and took is off again, and I haven't had a break in the same place since. Regular readers will remember that I've had other breaks to repair, but none thus far due to rusting.

Pegs

One thing that also crops up is the need to re-position the wire on occasion.

I find that when I do this, inevitably some of the pegs break. When I eventually run out of pegs -- I bought replacements from the shop before researching replacement pegs online, rookie error -- I'll buy some different types and see if there's anything to choose between them.

Here's what they look like:


Those of us with the Husqvarna/Gardena/Flymo mowers will be familiar with the hooks on the right, which have the tendency to pop out easily when you need them too. However, I've had a few issues keeping the wire underneath the hooks at the end.

That's where the Bosch style pegs have the edge. It looks rather as if you can loop the cable underneath the hook, and around the peg, making it more secure.

On the left is an unknown (to me) brand of peg. The advantage looks to be that they will stay in the ground more permanently, and there is a flat top holding the cable close to the ground.

Whichever you choose, make sure you have a few in your repair kit!

Permanent Perimeter Wire Connectors

Above, I mentioned that I have a collection of quick splice (spade type) connectors to get me out of a bind when I need to test the conductivity around the perimeter wire.

However, on occasion, it's necessary to replace a section of wire, or to re-position the central guide wire, also known as the return wire.

I wouldn't trust quick splice connectors for something permanent, preferring instead to go with the type of connector seen on the left. These are filled with a liquid to protect against moisture and dirt.

The blue one, and some of the red ones are made by 3M, and those are what I bought as 'extras' from the same place I got the pegs. This was before I shopped around.

It turns out that Amazon has a good selection of connectors. Wherever you buy them, I would advise having around 5 just in case the worst happens and you need to splice together two or three perimeter cable ends!

Keeping it All Together

Finally, some additional bits and pieces:

  • a hammer for the pegs -- I prefer a rubber head one;
  • pliers and cable cutters;
  • wire stripper
  • ...and a box to keep everything in!

Stanley, make a small, robust toolbox for only about £15. I've tried to keep everything in plastic bags, or in my regular toolbox, but bits go missing (presumably borrowed!) or I use them for other projects; in the end, I bought a dedicated toolbox and I advise you to do the same!

If you have any other tips or tricks for lawn mower perimeter wire maintenance, please let us know in the comments section below.


Monday, 20 March 2017

The Perils of a Robot Lawnmower with No Perimeter Wire

I get a lot of questions directed to me about installation of a perimeter wire and the reason why all of the major brands (Bosch, Worx, Husqvarna, Flymo, Gardena, etc.) rely on this technology. The fact of the matter is it wasn't always the case, and it's also still possible to buy robot lawnmowers that don't rely on a perimeter wire to delimit the mowing area.

But, is that a good thing?

Let's look at a few of the options available to manufactures using today's technology.

Robot Mower with Sensors


Mowers like the LawnBott Spyder, for example, don't use a perimeter wire. In fact, according to the LawnBotts web site, this is hailed as "a new beginning for robotic lawnmowers."

However, I would dispute this, as I have a friend with a sensor-based mower that pre-dates my own Husqvarna/Gardena R40Li, which he inherited from a family member who I assume had upgraded to a better version.

A quick question and answer session later revealed that while there are issues with sensor based mowers, largely my friend was well satisfied with the performance of the mower. However, there were a few basic flaws.

The first is that without a ground wire, the mower has to way to find it's way "home" for recharging. Therefore, it has to be charged indoors.

In fact, the mower has no way of knowing where it is, or where it has been; it's a dumb mechanical device, with none of the intelligence built into more modern models.

The way that they work is simple: they have sensors facing down which detect grass, and bump sensors to prevent chopping up the family pet. The lawn sensors rely on moisture detection, and the ability to tell the difference between mildly damp grass and, say, concrete or gravel.

My own feeling is that this is fine for most regularly shaped, enclosed areas, but as soon as you add a pond, or something that can become overgrown and poses a threat to the mower -- either damaging it, or allowing it to 'escape' -- I wouldn't feel personally comfortable relying on a few sensors to keep it in check.

Then there's the security aspect: one can imagine that stealing a plug-in to recharge mower that doesn't rely on a coded perimeter wire signal is a bit more of an attractive option than one which relies on a fully wired-in installation.

However, there are other options.

Robot Mower with a Virtual Perimeter Wire


These fall into two categories:
  • Roomba style transmitters;
  • Remote control / smartphone control plus learning.
In 2015, iRobot secured the go-ahead from the FCC to develop and deploy the same kind of technology that is used for their Roomba robot vacuum cleaners for outside use. This would allow them to create an iRobot lawnmower. Because it is guided by localised positioning using radio waves, however, it sparked anger amongst radio astronomers.

Of course, since then, their flagship technology has moved up a gear, and now uses all kinds of visual cues and smartphone interaction to "map and adapt" to the task in hand, rather than using navigation pods. Perhaps this move away from the older technology explains why we haven't seen the iRobot lawnmower as yet.

That leaves remote control or smartphone control plus learning. In fact, SmartMow has pinned their hopes on this approach, and have patented "Virtual Boundary Technology" which they explain as the ability to "Just walk SmartMow around the perimeter of your yard".

I'm actually looking forward to reviewing the SmartMow, because it appeals to me on a number of levels, including some exciting technology for connecting to it via a web portal.

The idea seems to be that the mower will learn where the perimeter is by being "shown" it, and then left to its own devices. Of course, the mower also has the regular sensors to allow it to avoid unexpected objects, but because the solution is software rather than hardware, my reservations re: ponds and robots going mad (as in the movie Short Circuit) still hold.

Robot Mower with GPS


Everything from farm machinery to those massive machines that rake the pistes in the Alps use GPS, so why not home robot mowers?

Husqvarna's Automower does just that. It even has its own app to help you fully take advantage of the set and forget nature of automatic robot lawn mowing.

(By the way, these are at the expensive end of Husqvarna's range -- the affordable models still use a perimeter wire... as do the ones with GPS!)

But here's the thing; it still uses a guide wire, presumably for security reasons.

In fact, aside from this experimental design from 2016, I was unable to find an example of a commercial automatic lawn mower that relied 100% on GPS for its perimeter detection and mowing capability.

So, all in all, it seems as if the good old perimeter wire is here to stay: sometimes lo-tech is really the best tech! If you're still wavering, read our Perimeter Wire Tips & Tricks Post; I'm pretty sure you'll agree that it's still the easiest, safest and most reliable method of keeping your robotic mower in check.

Friday, 18 November 2016

Robot Lawn Mower Perimeter Wire Tips & Tricks

Based on the last few years of robotic lawn mower ownership, I have a number of trips, tricks and tools for setting up and maintaining my robot lawn mower perimeter wire, as well as some recommended products.

A key point to remember is that while some of these parts are compatible (pegs and connectors, for example) many of them are not. At the same time, for some of the more basic installation and maintenance tasks (extending the perimeter wire, for example) regular off-the-shelf third party components can be used.

Robot Lawn Mower Perimeter Wire Installation

The first tip is to be prepared to move the wire around after it has been installed. For this reason, I recommend laying the wire on top of the grass, rather than digging it in.

Figure 1 : Poor Return Wire Installation
My first attempt at laying the perimeter wire wasn't exactly a triumph (see Figure 1).

Our lawn mower is the excellent Husqvarna 105 / Flymo 1200 / Gardena R40Li, and I followed the instructions to the letter.

What I forgot, however, is that something the size of a robot mower doesn't easily pass through a gap in a fence.

In addition, the design of the mower actually gives you a way out -- in the form of the return wire (the blue line in Figure 1). How it works is this: the mower leaves the charging point (on the right) and mows the lawn at random.

When it runs out of power, it will look for the return wire, and follow it back to the charging station.

The trouble is, when installed as above, the mower will (a) rarely make it into the top-left, and (b) once it's there, it will run out of power looking for the return wire, which it almost never finds.

There are a few solutions to this. The simplest is to to carry the mower to the top-left, and then remembering to get if back again once it runs out of juice.

However, the saving grace comes from the mower's design.
Figure 2 : Better Return Wire Installation

Reading through the instructions it transpires that there is a way to get the robot to follow the return wire at the start of a mowing session.

This led to the solution in Figure 2. The black line shows the new location of the return wire, designed to help the mower find its way home.

At the same time, once set up correctly, the mower will, occasionally, start from the end of the return wire.

One last note: since I had already installed the blue wire, I didn't want to uninstall it, so I added a box that enables me to switch between the two. I'm cautious like that.

To achieve this, I used some kit from the following section.

Lawn Mower Perimeter Wire Maintenance

Although tough, perimeter wires can be broken. Especially if, like me, you've scrimped a bit and bought some lesser grade wire to extend the length of that which has been provided.

Figure 3: These are not the connectors you are looking for...
Here's a first hint: buy the wire that is recommended by the manufacturer. It's just better.

But, it's not indestructible, and so it helps to have a few bits of kit that can help you when the worst happens and someone cuts through it with a spade, or a rodent chews through it.

Or, more likely, one of the little terminal blocks that you used to connect two bits together fails.

These are not good connectors. They are not waterproof, and, over time, will fail you. In my case, it took about 18 months to 2 years before the first one failed. I've now replaced all of them.

The replacement connectors are hugely expensive. Luckily, I've found a place where you can get a selection of waterproof wire connectors for use on the perimeter wire, all very inexpensive.

My absolute favourite, though, is the damp-proof wire splice connector available through Amazon, pictured here in Figure 4.
Figure 4 : Better Wire Connectors

Firstly, they're not 100% waterproof, but I've found that this doesn't really affect them too much. Certainly not as much as a simple terminal connector.

They're also reasonably priced, and because you have to crimp them, they do hold better than some of the other solutions.

Finally, they're a 2-way and not a 3-way connector, so are less bulky when you have to partially bury them. The 3M ones that came with the mower tend to stick up and risk being sliced on the lowest blade setting.

With the connectors sorted out, there's just one item left: what happens when the lights go red?

Perimeter Wire Emergency Kit

The most common thing that happens is that one of the plugs at the back of the charging station pops out, breaks, fails, or otherwise needs replacing.

Figure 5 : Spade Connectors
Sometimes, it's enough just to push it back in. However, on occasion, they actually need to be replaced. Luckily, they're just spade connectors, and easily found on Amazon, for very little money.

In Figure 5, there's an example. For connecting to the Husqvarna / Flymo / Gardena base station, you'll only need the bit that crimps to the wire (perimeter / guide wire) and the other end 'plugs into' the base station.

However, these connectors also form part of my Perimeter Wire Emergency Kit, and can be used with any of the popular makes.

It's worth mentioning that any robot lawn mower with a perimeter wire needs a way for you to locate a break in the wire.

Typically, this requires connecting a 'flying wire' to the base unit (charging station) and then connecting it at various points around the perimeter wire to see where the break occurs.

But this is very troublesome if you need to go around breaking the wire and connecting a 3-way block to the perimeter wire before plugging in the flying wire. 

Figure 6 : Self Stripping Connector
Much easier is to use the self stripping connector type, as shown in Figure 6.

All you need to do with these is place them around the perimeter wire (with flying wire connected) and gently press the cover closed just enough to make the connection, but not enough to seal the connector.

If you press too far, don't panic, just leave it where it is.

These connectors are so cheap that you can afford to leave them in place -- and if you mark where they are, the next time you need to investigate a break, you just need to march up with your spade connector on the end of the flying lead, and plug it in!

One last tip: the flying wire need not be the best quality, but is must be long enough to run to the most distant point on your perimeter cable, as measured from the charging station.

So, those are the current robot lawn mower perimeter wire tips and tricks, from a few years of robotic lawn mower ownership. Feel free to add your own solutions in the comments below!

Sunday, 23 October 2016

Gardena Robotic Lawn Mower Review

We have owned the Gardena R40Li robotic lawn mower since I started this blog, back in 2013. In fact, one of the reasons I started the blog was to share my experiences and decision process, and as such now feels like the time is right to write a full Gardena robotic lawn mower review, having lived with the beast for three seasons.

For those who don't have time to read the full review, here are the bullet points. First, the good:
  • The grass has never looked better;
  • I got time back to do railway modelling instead;
  • The whole experience has been almost pain-free.
Now, the not-so-good:
  • Yes, it was expensive;
  • Yes, parts fail (if you don't take care of it);
  • Yes, moving the perimeter wire can be a pain.
The conclusion -- I would buy it again, but I'd take better care of it (i.e. clean it properly) and set it up a bit differently, probably getting in an expert to do that with me. After all, they did offer a free consultation!

Gardena Robotic Lawn Mower Installation

Installing the mower looked so easy on the DVD that came with it that I decided to go it alone, despite the kind offer to have someone come and help me install the perimeter wire (for free). One Sunday afternoon, instead of actually mowing with the old petrol-fired behemoth that it was to replace, I got stuck into the installation process.

The R40Li comes with it's own charging station, which sits on a perimeter wire, which stops the robot going off and mowing the tulips and neighbours drive when it should be doing the lawn. There's also a kind of follow-me cable that hooks up the mid-point of the perimeter wire to the charging station.

The idea is that, if the robot runs out of juice, it can find the wire, and subsequently find its way home. This is a system that works very well, but also has a dual use, as the wire can also be followed to a hard-to-reach part of the garden in case the mower is in danger of missing it due to a narrow entrance.

This is, in fact, something I regret not having done. 

Instead, my return loop is just a straight line. Having connected everything up and left it there for three years, I'm wary of upsetting the apple cart by relocating it, and probably the professional installer would have spotted my error straight away!

Other than that, once everything was in place, pinned down with the black plastic pegs and connected with waterproof 3M connectors (all supplied in the box), and plugged into my outside plug socket -- note, this is indispensible -- the mower charged up and was put to work.

It does take an afternoon of hammering little pegs in, testing electric circuits, and crossing fingers on occasion, but you can do it on your own. Just try to think it through a little bit more than I did!

Operation of the Gardena Robotic Lawn Mower

The mower runs on a daily programme, which can be varied through the slightly confusing on-board menu system. Be prepared to keep the instructions to hand for the first few weeks, as you'll be fine-tuning things like the time of day the mower should operate, and the number of times it follows the cable to the end before starting a run rather than just setting off in a random direction from the base.

And, the mower is governed by randomness.

It sets off when its charged, but pretty randomly, in a random direction, and changes that direction by a random amount whenever it hits an obstacle, or reaches the boundary perimeter wire.

Repairing the perimeter wire is also part of the ongoing operation and maintenance of these kinds of robotic mower, and it is a bit of hassle. Here's a tip: make sure you keep a long piece of single-core wire handy for troubleshooting, and don't bury the wire intentionally; just let the grass grow over it, or cover it with thin paving stones that are absolutely level with respect to the lawn.

The reason for this is that fault finding requires connecting one end of the cable to the base unit, and then hooking the other end to various points on the perimeter until you get a green light.

After the first few times, it gets a lot easier; but for that first time -- make sure you have wire handy, as well as a knife to scrape a little plastic off the perimeter wire, a crocodile clip to connect the wire to the perimeter cable, and some electrical tape to fix it up after...

Parts that Failed on the Lawn Mower

The first item in this category -- blades -- isn't really failure. You need to change the blades every so often.

Tell tail signs that the blades need replacing are:

  • Wobbling mower caused by uneven weight distribution (one might be broken);
  • Unusual noise;
  • Grass tips going brown (unevenly cut; more torn than cleanly cropped).
Luckily, removing them is child's play; but don't let a child near them because they're sharp! They just unscrew from the underside, and the packs of replacement blades come with new screws and full instructions.

Then, the wheels came off. Actually, that's not true. What happened was the rubber came off, and the wheels stopped gripping (this was after 3 seasons use, with no over-wintering). The replacements have a solid, moulded tread, so they'll last for the rest of the product's lifetime.

Also this year, the dampers broke. The rubber perished, and they stopped preventing the outer bumper from bashing against the collision detection system, as discussed here.

Other than these few points, which encourage me to take much better care of the mower (i.e. cleaning it and overwintering it properly), the last three seasons have been trouble-free.

Summary - Should You Buy a Gardena R40Li Robotic Lawn Mower?

Here's the thing -- I can't answer that, because I have no idea whether your lawn qualifies. However, if you hate following your mechanical mower around a pretty standard lawn, then I'd certainly consider it.

Thursday, 24 September 2015

The Robotic Lawn Mower Perimeter Wire Revisited...

Fitting a perimeter wire often requires breaking and re-connecting individual cables together; and when you buy a robotic lawn mower, they come with a selection of appropriate connectors. These, however, are quickly used up, and especially if the wire breaks (which it will do), leading to a hunt for replacement connectors.

Perimeter Wire & Guide Wire Breakage

For robot mowers that use perimeter wires, there are usually two ways that the wires are used:

  • as a boundary for the work area;
  • to guide the mower to the charging unit.

While any wire break is irritating, breaks in the boundary wire present more of a headache than the guide wire, as it involves investigating the whole loop. The instructions for the Gardena 40Li / Flymo 1200R show that there are three connection points on the base: two for the boundary wire and one for the guide wire.

There's also a light on the base (where the mower 'docks' -- you need to take it out to see the light) which has several states. States related to the boundary and guide wires are:

  • Green -- all okay;
  • Blue flashing -- break in the boundary wire;
  • Yellow flashing -- break in the guide wire.

Fixing the guide wire is easy enough, as you can trace it fairly easily (I made a plan of my own installation!), and splice the wires together.
Splice Clips

To do this, I use a splice clip, pictured here on the right, which costs about 2.5 EUR for 20 (less than 4 GBP) delivered, from online retailer Banggood.

These might not be water protected like the 3M ones that came with my Gardena 40Li, but they do the job adequately, and are a lot better than the 'sugar cube' type blocks that I was using previously, which tended to rust.

These clips can also be used to repair the boundary wire, once you know where the break is!

The instructions for doing this can be a bit confusing, but the diagrams in the user guide are pretty self-explanatory. However, since they require plugging a flying wire into the base unit, and then using it to test ever-increasing sections of the perimeter wire, I found using a terminal and spade connector made things easier.

I found these on Banggood at the same time as the splice clips (click here), for less than £2 per pack of 5. One of the 'spades'can be attached to the end of the flying wire, of which the other end is plugged into the base, in place of the regular other end of the boundary wire.

Terminal/Spade Crimp Clips
The t-connection bits end up on the boundary wire -- there being no way to take them off -- but are useful each time there's an issue.

As long as you remember (or write down) where they are, you can troubleshoot that much more easily, as well as 'shorting' between two points if you want to limit your robotic mower for some reason.

To do that, all you need is a bit of wire, the right length, with a spade at each end, and two points on the perimeter wire with a t-connector between which to put the flying wire. Now, when the mower approaches it, it will treat the new wire as if it is the boundary wire.

Simple!

Thursday, 26 September 2013

The Robomow RL 555-HD Lawnmower : A Robotic Automatic Lawnmower with a Few Issues!

Firstly, a disclaimer : I don't actually own one of these, but have spent time gathering the opinions of others, and hopefully can point out a few of the glaring omissions in the design of the mower, whilst helping out anyone who owns one (or something similar) and is having issues with it.

What we have is a re-branded Husqvarna (marketed by Gardena on the continent, and Flymo, I believe, in the UK) and, for the record, I'm pretty happy with it.
The Robomow RL 555-HD

The first issue is that the 555 needs to be indoors in order to be charged. This doesn't make sense for something that ought to be automatic in every sense. In fact, I was hard pressed to find another robotic mower that has the same requirement.

Luckily, Robomow have fixed this design fault in other models, such as the RL2000 and the aptly named City 110 (it won't mow anything bigger than a 'city' lawn!)

The 555 has, instead, a remote control that is supposed to be used to drive it out of the garage and onto the lawn. That feels a bit like pushing an old fashioned lawnmower (sorry, traditional lawnmower) out onto the lawn, and not what you'd expect from a 21st century invention.

Once on the lawn, the 555 navigates using a perimeter wire. This is the preferred method of enclosing mowing zones, and used by Bosch, Flymo, Robomow, and others. Usually it works well, but when it doesn't it's usually because there's a break in the wire.

These can be hard to track down, and there's no real substitute for going along the wire (a pain if it's been dug in) and trying to find the fault. However, that's a problem shared by all the current market leaders.

A word of advice - first check that the connectors are still plugged in okay by unplugging and re-plugging them into the base unit. Then, if that fails, change the connectors (I've left about 20 inches of cable after the plugs just so I can do that!) just to be 100% sure it's the wire, and not the plugs.

The plugs are outdoors, so it could just be that they have become full of water, eaten by pests, or otherwise damaged or moved.

The mowing action is also the same as any other automatic robotic lawnmower in that they don't pick up after themselves. They're designed to be run frequently, clipping the ends off the grass, and letting it drop down onto the lawn, thereby fertilizing it (the mulching idea.)

Now, the Robomow 555 has two issues here.

The first is that it is heavy to take from the garage to the lawn, and so having it mow every day is going to become a problem over time. Secondly, there are issues with the Robomow and wet grass, according to an Amazon review. Apparently, it doesn't cope well with it.

This could be an issue, because mulching is best done when the grass is damp, according to one of my fellow mower-owners. But, since I don't own one, I can't comment further.

All in all, the main downfall of the 555 is that it can't be charged outside, which removes one of the central pillars of the buying decision : that it be convenient. To give them credit, the manufacturer has spotted this, and other models are self-charging, outside.

Wednesday, 11 September 2013

Installing the Perimeter Wire for your Automatic Robotic Lawnmower

One of the trickiest tasks when you first install your automatic robotic lawnmower is getting the perimeter wire right.In fact, there are usually two wires:

  • perimeter wire round the outside (stops the robot leaving the lawn)
  • guide wire (helps the robot get back to the charging base)

We'll deal with the guide wire in a later article, for now let's look at the perimeter wire. The easiest example is a rectangular lawn.

Placing the Perimeter Wire Around a Rectangular Lawn

Many lawns are basically rectangular - even our lawn, which has two zones (front and back) and an 'upper back' lawn, some swings, raised flower beds and a patio, is essentially rectangular.

The only concerns are:

  • having enough wire
  • what to do about corners

The first is easy enough - just measure the perimeter, and buy more wire if necessary! The second needs some explanation. The picture on the left shows my initial installation attempt, next to the patio.

Incorrect Perimeter Wire Placement
The blue line shows the wire, and you can assume that the area to the left and below the picture are out of bounds for the mower.

The red line shows the path that the mower consistently took. The result was that it would keep stopping with an "Outside mowing area" error!

In the manual, the instructions were quite clear to avoid sharp corners, but somehow I ignored this advice.

Clearly, you do need to follow it, so I adjusted the wire to look like the picture below.

Now, the robot doesn't exit the mowing area, and all is well. Of course, I had to buy extra clips because it's a more complex shape, but Husqvarna sells them in packs of 100, so although it was an extra expense, it wasn't insurmountable.

Correct Perimeter Wire Placement
Plus, it was cheaper than replacing the blades which were grinding themselves on the coping that runs around the edge of the lawn!

Another point to watch when laying the perimeter wire is the distance between the wire and the edge of the lawn.

The temptation is to get as close as possible to the edge, to avoid having to use a strimmer or edge cutter, but it's a false economy, as the robot needs space to turn, and not leaving enough space means that it will also exit the mowing area.

For those who have a raised edge, and are using that to limit the robot, that's fine, but it does cause wear and tear to the bumper.

Of course, if you are lucky enough to have a robot mower that uses ultrasound, that doesn't apply!

The Perimeter Wire and Obstacles

It is also possible to branch the perimeter wire out, and use it to go around an obstacle in the lawn (such as a valuable bush, or tree). The only thing to watch is that the wire is kept close to itself when it is doubled back (to return to the perimeter) so that the robot ignores it. Otherwise, it can get stuck in an area bounded by the outgoing wire, and the edge of the mowing area.

My preference was to build a small wall around things like shrubs and trees, because:

  • it would take a lot of wire to go round every obstacle
  • it increases the risk of problems with the wire breaking.

Again, following the instructions is paramount!

Setting Up The Perimeter Wire with Multiple Zones

Our lawn is essentially split into three parts, two are connected by a passageway, but the other is at the front of the house and not reachable by the robot mower automatically. We carry it between the back and front zones, manually!

The front zone is created by a perimeter wire that is taken off the main charging station, and runs completely around the lawn, bounding it.

At the back, the perimeter wire runs around the edge of the first zone, and then along the edge of the passageway, around the second zone, and back to the charging station.

The gap between the wires at the closest point of the passageway is less than a meter; this isn't ideal, as the robot sometimes doesn't quite make it through (in either direction) and therefore:

  • gets stuck in the second zone, or
  • never mows the second zone!

I'm still looking for the best solution for this, but I suspect I'll end up widening the passageway. I'll keep you posted...